|
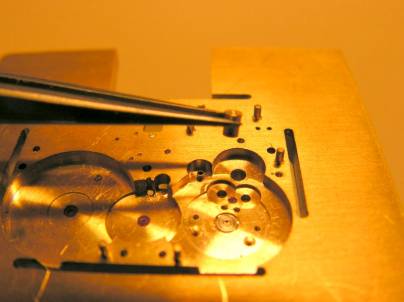
Only fools will goģ step 3 - The problems start I now have a movement with installed going
train up to the escape wheel and anchor. It seems very strange to me that
when the escapement turns the anchor can get in a state where it wobbles back
and forth, but doesnÆt lock to the sides. A visit to my tutor shows me how
this should look; the anchor should lock conclusively to both sides. Not what
I am seeing at all. Exact measuring on an optical table shows that I have
drilled the placement for the escapement wheel too far from the anchor, a
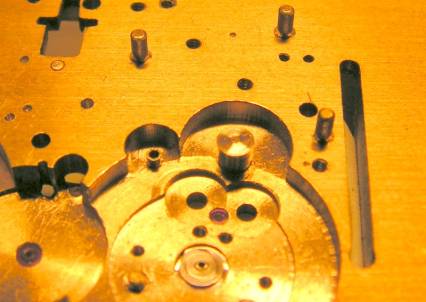
manufacturing error. It is interesting to note that the geometry of the
pallets and escape wheel teeth allows a completely blocking position at a
certain, too large, distance between escapement wheel and anchor. This seems
counter-intuitive, but is born out using paper cutouts of the escapement
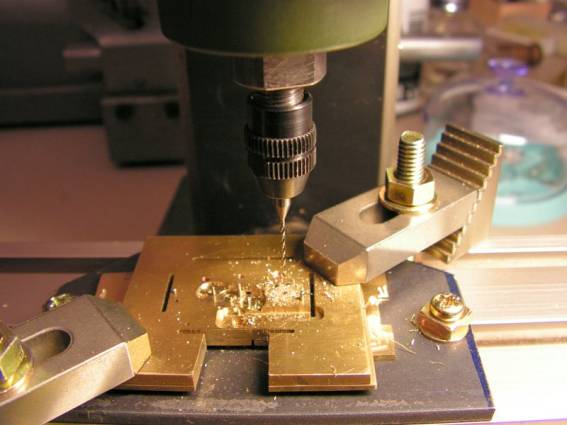
wheel and anchor enlarged 20 times. What to do? I decide not to completely remake the
plate and bridges at this point, but to drill out the existing holes, fill
with a brass plug and try to aim correctly when drilling this time. Here some
pictures of this work.
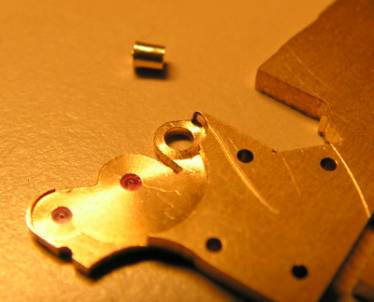
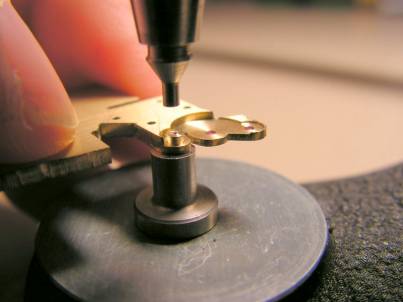
Plug in place ready to be pressed in. I am
using the jewelling press to press this in and keep control.
After turning down the excess on the lathe
facing plate, another try at drilling at the correct position.
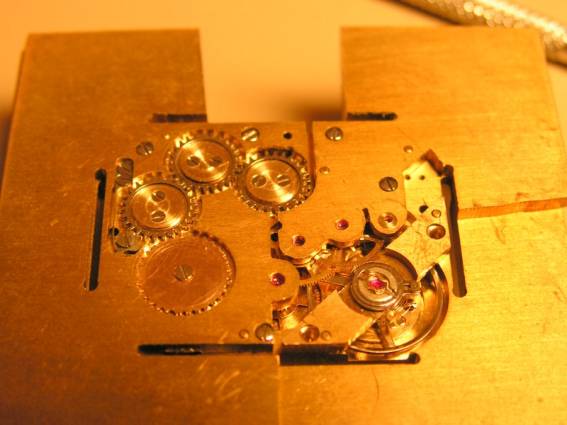
After this detour things are looking
better. And here it is, the first picture with the
balance mountedģ and what you canÆt see, it is turning. The amplitude is very
weak, but it is self-sustaining. I am ecstatic!
But now, how to get the amplitude up? The
possibilities are multitude. My tutor says if the going train is not perfect
there is no way it will work. When wound at the barrel the going train should
stop only after reversing. I am not seeing that. I put all the parts through
the ultrasonic cleaner to be sure that there are no shavings or dust from all
the machining work hiding somewhere and causing problems. Reassembly,
checking all shakes and oiling improves the going train so that it really
does stop only after reversing, but the balance amplitude shows no
significant improvement. I am slow to see it, but my balance is
standing at a slight angle. This appears to be causing the hairspring to touch
on one edge of the balance bridge. I did try and cause the hairspring to not
touch, but that is not the solution and messed up my hairspring some. I see
that once messed up a hairspring can cost one days of work. In the end I realize that the error happened
very early on. I first drilled the holes for the incablock using a standard
twist drill, not having a better drill near that diameter. Of course the hole
ended up slightly triangular. In afterthought I remember that this is just
about always the case with such drills. I then brought the hole up to full
diameter on the lathe, but with the triangular hole I lost the real center. I
should have used a good drill to assure good centering, as I had to enlarge
the hole on the lathe anyway. That way I would have not lost the centering.
All the other holes I have drilled with the special hard-metal drills that
are made for making the holes in printed circuit board production. They cut
clean and perfectly. And the marked drill size is the size of the hole it produces,
not the size of the drill. They are a joy to use, but do break quite easily.
My tutor tells me that for precise watch work even these drills are too long
and can wander. Drills for watch work should be more like 5 mm long maximum I
am told. What to do now? I hate to admit it, but
for the moment I have removed the steady pins and with the leeway around the
screws am able to move the bridge enough to have the balance stand straight.
The balance amplitude is better, but still not good. The balance frequency is
also strangely off by about 25%. How can that be? Give me a little time to find a clean(er)
solution for positioning the balance bridge and for another visit to my tutor
to elucidate some more possible reasons for insufficient amplitude and wrong
frequency. -----------------.....-----------------.....-----------------.....-----------------.....-----------------
Yes, things are just fine now, the reason
for the frequency and amplitude problem totally unexpected, i.e. not
something I did terribly wrong. It was actually just a passing remark of my
tutor that set me on the right track. He mentioned once that the 2824 had
been made both in 4Hz and 3Hz versions with identical wheel placements. I
realised that was exactly the amount I was off. For 15 seconds movement of
the second hand it was taking 20 seconds. When this finally dawned on me I
quickly opened up another movement to extract its balance/hairspring
assembly. Placing them side-to-side, there was no apparent difference in the
balance except one was nickel and the other glucydur, but the hairsprings
were not the same. So I decided to install the new one and see what happens.
And what happened was that the timing is right and the balance amplitude is
OK, after a little fiddling to get the pallet draw right. One of the movements that I canabalised
for this project must have been a 3Hz movement. Which means that I must also
have an escape wheel/seconds wheel pair for 3Hz too. Maybe that was the
seconds wheel who's misery I ended by stepping on it while I was trying to
find it on the floor. Since then my strategy for finding pieces that have
found their way to the floor has changed to first inspecting the places where
I want to put my feet. There is still a pretty big difference in
amplitude depending on the position, between 200░ and 290░, and I realise
that I should be getting over 300░, but I am going to wait to try to find
that until I am finished drilling and filing. I still suspect brass chips or
dust hanging out around the bearings as my biggest problem. Once that
"dreck" has found its way into the oil, however tiny that amount of
oil might be, only a real cleaning will help. I think the "clean"
way to do this is to have a room for machining, the "dirty room",
and a room for assembly, the "clean room". That way one would have
a chance to keep things as clean as one should. When, however, everything is
happening on the same benchtop you can be as careful as you want. It is still
not enough.
And, BTW, I did find a cheat for re-positioning
the balance bridge without lots of work. I turned the steady pins slightly
conical, the top end remaining the original diameter. The radius at the
position on the pin corresponding to the top surface of the plate is down
0.2mm. I then bent the pin 0.2mm in the direction needed. The pin remains
stable and at the same time the bridge still sits perfectly flat on the plate
and is well positioned. Although the top of the pin is now at a slight angle
the difference is so small that it is invisible. It seems to work fine, but
please don't tell anyone. I am now preparing to finish the keyless
works to be able to set the time from the crown. This is the part of the
movement that I am most worried about. It has the largest portion of my
design, the smallest portion from ETA. Then it will be time to make the
hands. Don Copyright ® 2005 Donald W. Corson |

Ā