|
Only fools will go… step 5 -
Gear Cutting etc.
Before I can really advance any further with
finishing or decoration of the movement I need to have all the functions
working OK. Right now I still have one function not working satisfactorily;
winding. There are two things that are causing problems there as I see it.
The solutions are:
Let’s start with the more fun part, my
first attempt at cutting a gear. The deal is this, to cut a gear you need
to have two turning axes, one for the gear blank and one for the cutter. The
cutter turns continuously, but the blank just needs to be indexed at certain
positions. I want to be able to cut this gear without purchasing any new and
expensive machinery (or old and expensive machinery either). So I set out to
find a way of using the two turning axes I have, that of the lathe and the
milling machine together to reach my goal. After a couple of weeks of mulling
over possibilities of mounting the lathe on the mill, mounting portions of
the lathe on the mill, mounting the mill on the lathe, etc., I found a
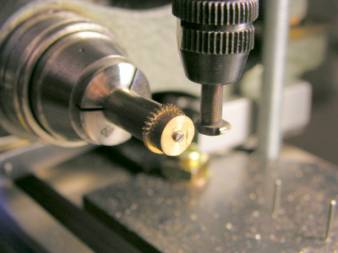
solution. I made a mount for the lathe headstock on the table of the mill.
You can see the whole setup below.
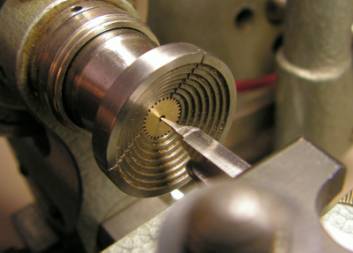
On the left is the lathe headstock bolted
horizontally on the table of the mill. The drive pulley of the headstock has
64 (I thought) indexing holes and there is a spring-loaded lever for indexing
with these holes. In the chuck I made a fixture to hold the gear blanks. The
picture below was made on the lathe as I turned the blanks to size, before
the headstock was fixed on the mill.
Actually I am showing this all out of
order. First I made the cutter from a piece of 6mm tool steel. I will show
you how I did it and then describe how I should have done it.
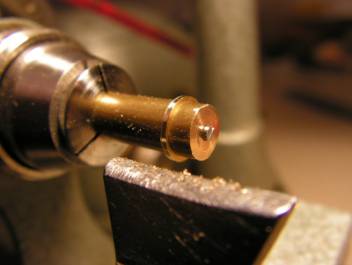
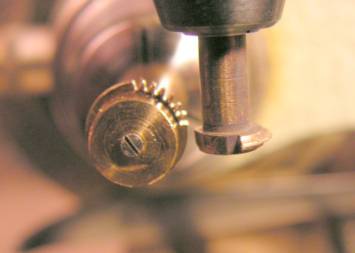
I started out by turning down the shaft to
4mm leaving 2mm in the middle, which I will form, to the cutter. I tried to
turn the cutter by hand and without enough magnification, which is a mistake.
I didn’t see it at all, only after cutting the gear did I see that the form
was a tad lopsided, cutting me lopsided teeth. I thought that having two
concentric shafts I could turn the cutter in the lathe and end up with
something symmetric, but it didn’t work cutting free hand as I did.
After I thought that I had the cutter form
OK, I turned down one of the shafts eccentrically, that is the shim I used in
the chuck to get 0.5mm eccentricity. I then removed the non-excentric shaft
and filed down about one half of the cutter profile, the one tooth of the
cutter is at the most eccentric point. That gives the relief behind the
cutting edge and will also allow some sharpening in the future. Then
hardening and tempering to pale straw color.
With the blanks on the fixture all mounted
on the milling table as above and after centering the cutter in the middle of
the axle and at the right distance from the center the actual gear cutting
started. Advance and return the table, then turn the headstock by 2 index
holes. Of course I discovered just before starting that there are 60, not 64
positions on the index on the lathe pulley. I decided to cut a gear anyway,
just reduced the diameter as required to compensate for the two missing teeth.
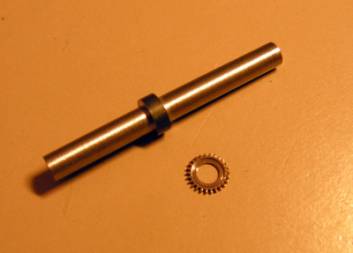
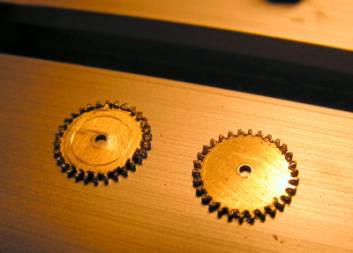
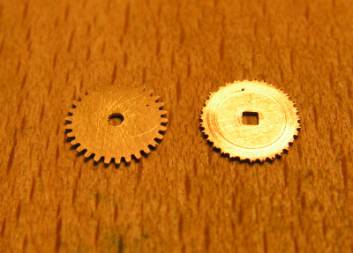
The gear cutting went fast and easy. Below
you can see the results, the gear and the backup blank.
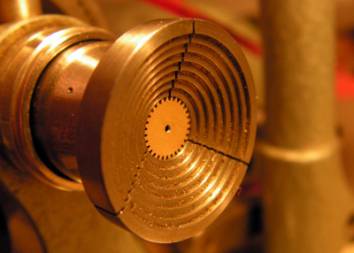
After a little cleaning up to remove the
burrs the hole in the center is turned concentric with the teeth on the
lathe.
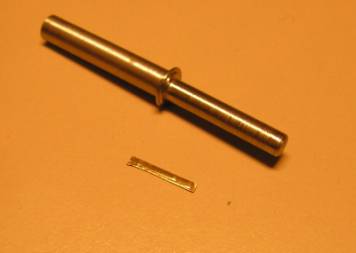
Above you see the finished gear along with
the ETA original gear that I manhandled, just a slight difference, huh! It is
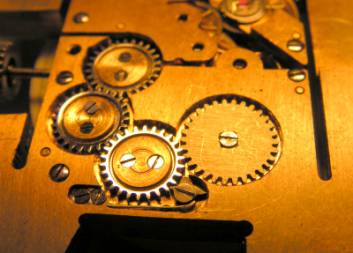
no wonder that the winding was so difficult. What is there to say about this work? Of
course this gear is missing 2 teeth. Here in the winding mechanism they will
never be missed, but I will make an index wheel for 32 teeth and with those
two additional teeth the winding force will be reduced unnoticeably. The
tooth engagement will also be better. You can see the lopsided teeth in the
picture above. No, it is not from placing the cutter too high or low compared
to the axle of the blank. Under the microscope one sees that the cutter is
also lopsided. I think that it is impossible to cut a good tooth form
free-hand on the lathe. For my next attempt I will make a graver with the
form of one side of a tooth and use that on the cross table to form the
cutter. Using the two shanks as I had made it should be no problem to do that
from both sides and get a truly symmetric tooth form. There is also the
finishing of the cutter. I did not polish it and that can be seen on the
surface quality of the cut teeth. Polishing is necessary. Another problem that can be seen is that
one tooth is smaller than all the others. That is the last tooth cut, you can
see it at about 4 oclock on the picture above. Apparently the blank turned
imperceptably during cutting. The pressure from a single screw in the middle
is not enough to keep everything in line. In the future I will glue the
blanks to the fixture with nail polish or something similar to prevent such
movement. In general I would say that this first
attempt has shown that cutting gears in this way is quite possible, but there
are several details that need to be cleaned up. I have only tried cutting
brass, but this ratchet wheel should be in steel, so this is also another
step to take. But in any case, substituting this gear
for the manhandled ratchet wheel from ETA makes a tremendous difference in
winding. But the Breguet teeth on the sliding pinion are still jumping. A short consultation with my mentor. He
thinks it is simply that the clutch lever spring is not strong enough and
that after a while the teeth have worm making it even worse. So I made a new
clutch lever spring, which is twice as thick. It is also longer placing the
pressure point farther down the lever and thus increasing the mechanical
advantage. Doubling the spring thickness should make the force 8 times as
much, there is a cubic relationship in the spring calculation formula there.
Now I have not only smooth winding from
the new gear and after replacing the sliding and winding pinions with new
pieces no more jumping either. It all looks good to me.
So I decide that I don’t need to wait until
I have remade the ratchet wheel to say that all is OK for the watch
functionality. I now claim that I have a working movement and will start the
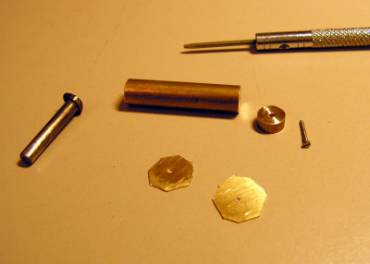
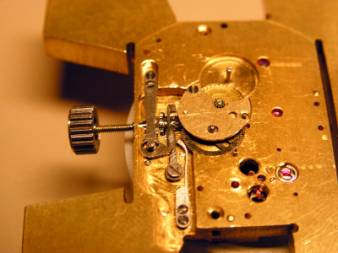
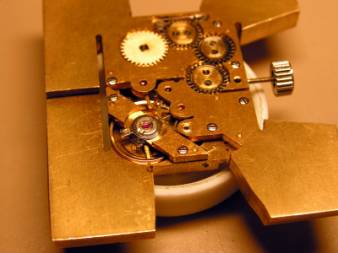
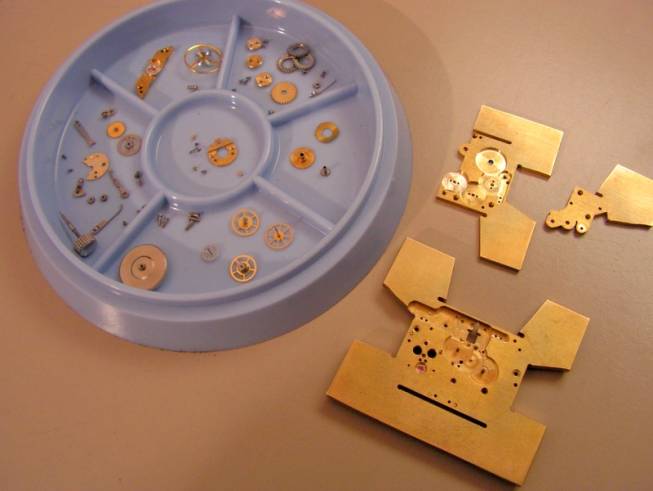
finishing next. There it is, a complete watch. Here you
see all the pieces:
For the statistics lovers among you:
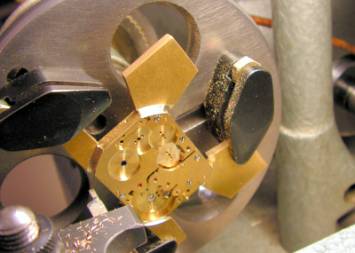
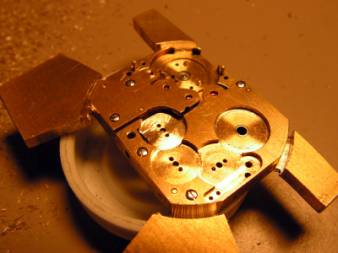
I will now cut out the movement, relieve
it of its “ears” and head out to find out how to do finishing.
So now I will head back to the top of the
page, make a good cutter as I have explained above and try cutting that gear
again. But also start the finishing of the plate and bridges. Don Copyright © 2005 Donald W. Corson |